My Blog = My Life: 
Search results for butter

  • Peanut Butter Chocolate Cheesecake {GF}

    Peanut Butter Chocolate Cheesecake {GF}

    Peanut Butter and Chocolate were meant to be together. In a cheesecake. This is gluten-free at it's finest because you'd never know. A decadent indulgence that looks complicated but is a cinch to make and turns out every time! Promise. Scroll down for the Trim Healthy Mama version!
    Peanut Butter Chocolate Cheesecake {No-Bake} Time: 25 minutes plus cooling Servings: 12 Gluten-free
    Ingredients:
    Crust:

    • 1 cup almond flour
    • 1/4 cup melted butter
    • 1/2 cup sugar
    Filling:
    • 2 8 oz. packages of cream cheese, softened
    • 1 cup sugar
    • 1 1/2 cups peanut butter
    • 1 1/2 cups whipping cream
    Chocolate Drizzle:
    • 1 cup chocolate chips
    • 1/4 cup whipping cream
    Garnish:
    • Salted peanuts
    Directions:
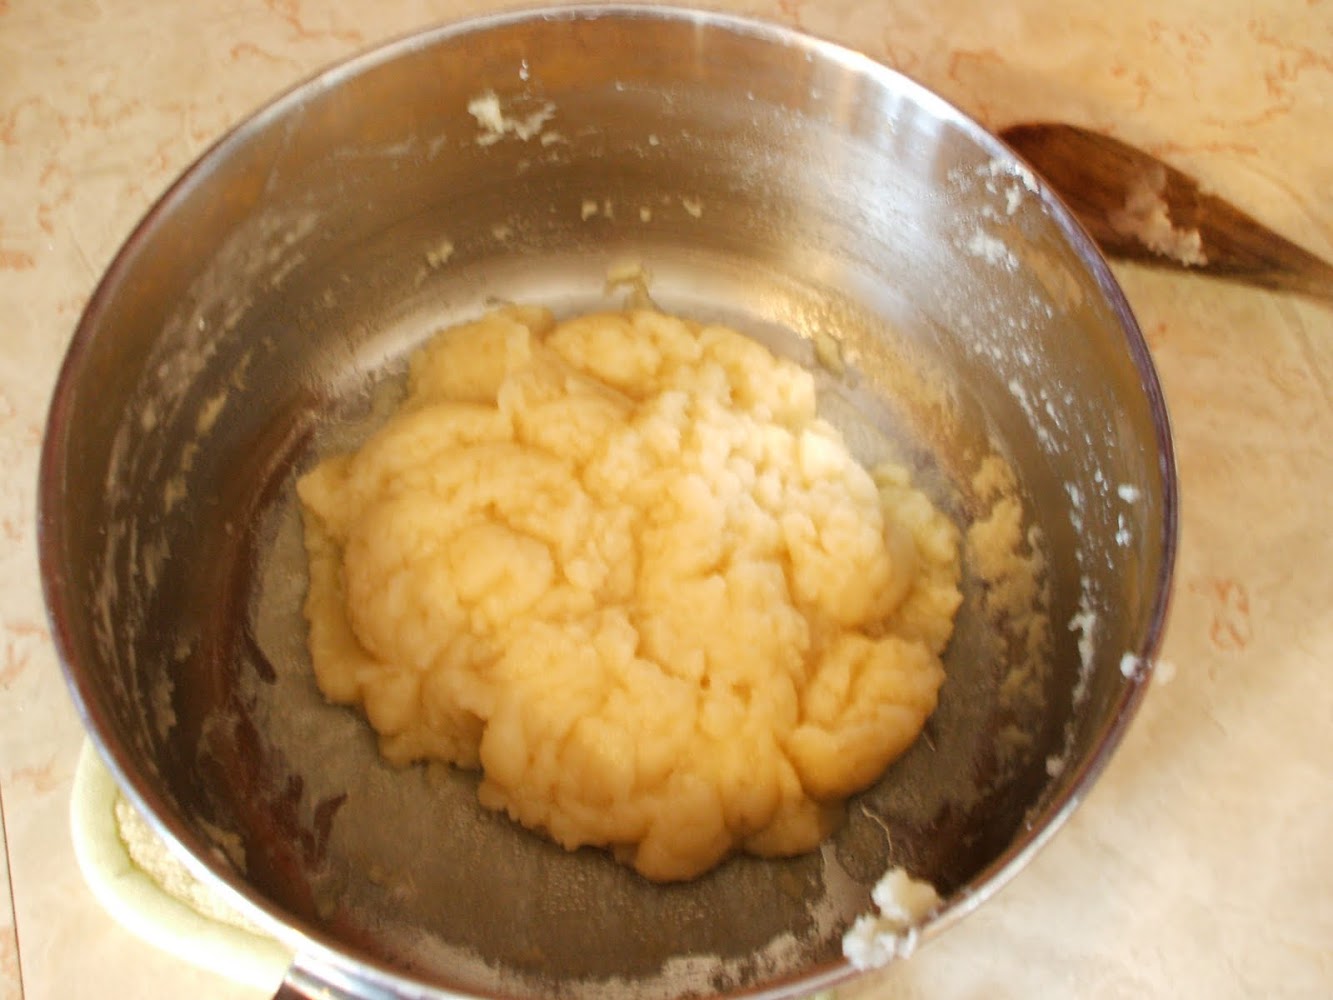
    Stir almond flour, butter, and first amount of sugar together. Pat into spring-form pan and bake at 350 F for 10-15 minutes or until edges are golden. Cool.
    Beat cream cheese, sugar, and peanut butter together. In a separate bowl, whip cream. Fold into cream cheese mixture and pour over crust. Cool in fridge for 2 hours or until hardened.
    Melt chocolate chips and whipping cream over low heat in a small saucepan. Pour into a sealable bag and snip off one corner. Drizzle over cheesecake. Garnish with peanuts. Chill until serving.

    Indulge and enjoy!
    And here's the Trim Healthy Mama version. You wouldn't know the difference, but it's a lot less fattening without the sugar.
    THM Peanut Butter Chocolate Cheesecake Time: 25 minutes plus cooling Servings: 12 Satisfying. Gluten-free.
    Ingredients: Crust:

    • 1 cup almond flour
    • 1/4 cup melted butter
    • 2 tsp Truvia
    Filling:
    • 2 8 oz. packages of cream cheese, softened
    • 6 1/2 Tablespoons Truvia
    • 1 1/2 cups peanut butter
    • 1 1/2 cups whipping cream
    Chocolate Drizzle:
    • 6 ounces (1 cup) dark chocolate
    • 1/4 cup whipping cream
    • Truvia to sweeten, if desired.
    Garnish:
    • Salted peanuts

    Directions: Stir almond flour, butter, and first amount of Truvia together. Pat into spring-form pan and bake at 350 F for 10-15 minutes or until edges are golden. Cool.
    Beat cream cheese, Truvia, and peanut butter together. In a separate bowl, whip cream. Fold into cream cheese mixture and pour over crust. Cool in fridge for 2 hours or until hardened.
    Melt chocolate and whipping cream over low heat in a small saucepan. Pour into a sealable bag and snip off one corner. Drizzle over cheesecake. Garnish with peanuts. Chill until serving.

    In the interest of full disclosure, some of the links in this post are “affiliate links.” This means if you click on the link and purchase the item, I receive an affiliate commission. I only recommend products I use personally. Your purchases through these links help support Growing Home. Thank you for your continued support!
    Linking to: Raising Homemakers, Deep Roots At Home, Raising Arrows, A Wise Woman., Walking Redeemed, The Better Mom, The Modest Mom, Stacy Makes Cents,Gluten-Free Wednesdays Nourishing Joy, Skip to my Lou

  • Roasted Red Pepper Butter

    Roasted Red Pepper Butter

    Roasted Red Pepper Butter is a great way to pack a lot of savory goodness into a healthy fat! You can use it as a spread for sandwiches or crackers, or serve with meat and fish for some flavorful protein.
    Recipe adapted from Nourishing Traditions, pg. 151.
    Roasted Red Pepper Butter Time: 10 minutes prep, plus 30 minutes oven-roasting. Yield: 2 cups Gluten-free, Trim Healthy Mama Friendly (S)
    Ingredients:

    • 2 large red peppers, cut into 8 strips each
    • olive oil
    • 1 3/4 cups butter, softened
    • 1 tsp sea salt
    Directions:
    Place pepper pieces in an oiled, 9x13" glass baking dish and bake at 400 for 30 minutes or until skin begins to buckle. Using tongs, place pepper pieces into a sealable bag for 10 minutes to loosen skin. Remove skin and place pepper pieces in a food processor or blender and puree until smooth (I like a few chunks in mine). Add butter and sea salt and blend well. Place in a sealed container and store in the fridge.

    Place pepper pieces in an oiled, 9x13" glass baking dish.

    Bake at 400 for 30 minutes or until skin begins to buckle.

    Place pepper pieces into a sealable bag for 10 minutes to loosen skin.

    Remove skin.

    Puree in blender until smooth (I like a few chunks in mine).

    Add butter and sea salt and blend well. Place in a sealed container and store in the fridge. Enjoy!

    If you enjoyed this post, you may wish to follow Growing Home for updates via Google Friend Connect, Facebook, Twitter, Pinterest, Google +, or have them emailed directly to your inbox.
    In the interest of full disclosure, some of the links in this post are “affiliate links.” This means if you click on the link and purchase the item, I receive an affiliate commission. I only recommend products I use personally. Your purchases through these links help support Growing Home. Thank you for your continued support!
    Linking to: Raising Homemakers, Deep Roots At Home, The Better Mom, The Prairie Homestead, Stacy Makes Cents, Natural Living

  • 5 Favorite Trim Healthy Mama Recipes

    5 Favorite Trim Healthy Mama Recipes

    These recipes are reprinted with permission from the authors.

    Just Like Wheat Thins Crackers | Trim Healthy Mama,
    I had my doubts about this recipe. "Just Like Wheat Thins?!" Yeah, right. You need refined flour and sugar to achieve that kind of deliciousness, don't you? Apparently not. These crackers are amazing and taste like the real thing I can't seem to keep our house stocked though - they disappear quickly!

    • 3/4 cup flax meal
    • 3/4 cup almond flour
    • 2 egg whites
    • 2 Tbsp. nutritional yeast
    • 1 Tbsp. parmeasan cheese
    • 1/4 tsp sea salt
    • dash of black pepper, onion powder, and garlic powder
    • 1 Tbsp olive or coconut oil
    • 1/2 tsp baking soda
    Combine ingredients well and work into a dough ball with your hands. Place ball on parchment lined cookie sheet. Place another piece of parchment paper on top of dough ball and roll out into a slab the thickness of a cracker. Take off top piece and score into small squares. Bakes at 350 for 15-20 minutes.

    Fooled Ya Pizza | Trim Healthy Mama,
    I've always felt bad for Brad who used to eat cardboard-like gluten-free pizza crusts while we enjoyed the gluten packed version! I had heard rave reviews about this cauliflower crust from other mamas on the Trim Healthy Mama plan and decided to give it a try even though it sounded pretty gross. Boy, was I wrong! Our entire family enjoys it just as much as the real thing! You'd never know cauliflower was the magic ingredient!

    • 1 bag (16 oz.) frozen cauliflower (I used fresh)
    • 3/4 cup egg whites
    • 2 cups skim mozzarella cheese
    • sea salt and other seasonings (I used Epicure's Pizza seasoning blend)
    • pizza sauce and other pizza toppings (I used pepperoni, green pepper, red onion, cheddar and mozzarella cheese)
    Lightly steam cauliflower and squeeze out all the excess water otherwise your crust won't get crispy (I skipped this step and used raw cauliflower with great results!). Put cauliflower in food processor and pulse a few times until you end up with rice sized pieces.

    Add egg whites and pulse again.
    Add cheese and other seasonings (sea salt, Italian seasoning, onion and garlic powder). Mix ingredients together well with a spatula.
    Line a cookie sheet with parchment paper and grease well. Spread crust mixture evenly across cookie sheet. Bake at 450 for 20 minutes. Cool.
    Add pizza sauce and toppings and broil until toppings are done (I baked it at 400 for 8-10 minutes).

    Peanut Squares | Trim Healthy Mama,
    These squares are so yummy! A combination of sweet and salty, we enjoy them as a snack and a dessert. They're gerat to give along with a meal to a new mom too.

    • 1 cup almond flour
    • 1/2 cup dry roasted peanuts, chopped
    • 1/4 cup melted butter
    • 2 tsp Truvia
    • 1 pkg cream cheese, softened
    • 10 tsp Truvia
    • 2/3 cup peanut butter
    • 3/4 cup whipping cream
    Mix almond flour, peanuts, melted butter, and 2 teaspoons of Truvia together in a bowl. Press into 8x8 baking dish and bake at 350 for 10-15 minutes.

    While crust is baking, beat cream cheese and second measurement of Truvia together until light and fluffy. Add peanut butter and beat some more.

    In a separate bowl, beat whipped cream. Fold into cream cheese mixture and spread over cooled crust.

    Place in refrigerator to chill until set.

    Cheeseburger Pie | Trim Healthy Mama,
    This is probably our #1 favorite supper on the plan. It's all the goodness of a cheeseburger without the bun. You would never miss it! This is so satisfying and delicious. I make once a week in place of burgers on the barbie.

    • 2 lbs of ground beef
    • 3 tsp. onion powder
    • 1 tsp. sea salt
    • 6 oz. grated cheddar cheese
    • pickles, tomatoes, red onion
    • 2 eggs
    • 1/2 cup mayo
    • 1/2 cup heavy cream
    • sea salt
    • ground pepper
    • 6 oz. grated cheddar cheese
    Brown ground beef and drain fat. Stir in onion powder, sea salt, and 6 oz. of grated cheese. Place beef mixture in casserole dish.
    Layer on any of your favorite burger toppings. Our family loves a combination of red onion, tomatoes, and pickles.
    In another bowl, beat eggs, mayo, cream, sea salt, and black pepper together. Pour on top of casserole and sprinkle on the remaining 6 oz. of cheese.
    Bake at 350 for 35 minutes. We like it serve on a bed of chopped iceberg lettuce and drizzled with mustard and ketchup.

    Chunky Cream Pops | Trim Healthy Mama,
    This frozen dessert reminds me of my favorite ice cream, President's Choice Chocolate Fudge Crackle... except it's waaaay healthier, made with good fats and no sugar. We love this treat. It's Brad's favorite of all the desserts I've made from Trim Healthy Mama so far.

    • 1 batch of Skinny Chocolate
    • 2 8oz. blocks of cream cheese
    • 10 tsp. Truvia
    • 1 tsp. vanilla extract
    • 2 heaped Tbsp. peanut butter
    Make up a batch of Skinny Chocolate and put in the freezer to harden.
    Beat cream cheese, Truvia, and vanilla together. Cut up Skinny Chocolate into little bits and stir into cream cheese mixture along with peanut butter.
    Place wax paper on cookie sheet. Dump bite-sized spoonfuls of mixture onto paper. Insert a toothpick into center of cream pop and transfer to freezer. After an hour, pull pops off wax paper and transfer to a Ziploc bag for easy access.
    Here's a few more pictures of other Trim Healthy Mama recipes to satisfy the foodie in you:

    Spicy Chicken Wings, pg. 323

    Taco Salad, pg. 347

    Special Agent Brownies, pg. 383

    Trim Healthy Pancakes, pg. 223

    In the interest of full disclosure, some of the links in this post are “affiliate links.” This means if you click on the link and purchase the item, I receive an affiliate commission. I only recommend products I use personally. Your purchases through these links help support Growing Home. I humbly thank you for your support.

  • Peanut Cream Cheese Square {Gluten-Free}

    Peanut Cream Cheese Square {Gluten-Free}


    These squares are so yummy! A combination of sweet and salty, we enjoy them as a snack and a dessert. They're great to give along with a meal to a new mom too. This recipe comes from Trim Healthy Mama and is reposted with permission fro the authors. Ingredients:

    • 1 cup almond flour
    • 1/2 cup dry roasted peanuts, chopped
    • 1/4 cup melted butter
    • 2 tsp Truvia
    • 1 pkg cream cheese, softened
    • 10 tsp Truvia
    • 2/3 cup peanut butter
    • 3/4 cup whipping cream
    Directions:
    Mix almond flour, peanuts, melted butter, and 2 teaspoons of Truvia together in a bowl. Press into 8x8 baking dish and bake at 350 for 10-15 minutes.

    While crust is baking, beat cream cheese and second measurement of Truvia together until light and fluffy. Add peanut butter and beat some more.

    In a separate bowl, beat whipped cream. Fold into cream cheese mixture and spread over cooled crust.

    Place in refrigerator to chill until set.

  • Pumpkin Streusel Muffins

    Pumpkin Streusel Muffins

    It's that time of year for pumpkins and spice and everything nice! These moist muffins are full of Autumn flavor and finished with a delicious streusal topping. They go as quickly as I can make them!

    Time: 15 min. prep
    Yield: 30 muffins

    Ingredients:

    • 1/2 cup butter, softened
    • 1 cup sugar
    • 1/2 cup packed brown sugar
    • 1 1/3 cup canned pumpkin
    • 1 cup buttermilk
    • 4 eggs
    • 4 tablespoons molasses
    • 4 cups all-purpose flour
    • 2 teaspoons baking soda
    • 1 teaspoon baking powder
    • 2 teaspoons cinnamon
    • 1 tsp nutmeg
    • 1/2 teaspoon cloves
    • 1/2 teaspoon salt
    STREUSEL TOPPING:
    • 2/3 cup all-purpose flour
    • 1/4 cup brown sugar
    • 1 teaspoon cinnamon
    • 4 tablespoons cold butter

    Directions:
    In a large bowl, cream butter and sugars until light and fluffy. Beat in the pumpkin, buttermilk, eggs, and molasses. Combine flour, baking soda, baking powder, spices and salt; add to pumpkin mixture and stir until just blended. Fill paper-lined muffin cups two-thirds full.

    For topping, combine flour and brown sugar; cut in butter until mixture is crumbly. Sprinkle over batter. Bake at 375° for 17-20 minutes or until a toothpick comes out clean. Cool in pan for 5 minutes before removing to a wire rack. Yield: 30 medium muffins.

    Enjoy!

    If you enjoyed this post, you may wish to follow Growing Home for updates via Google Friend Connect, Facebook, Twitter, Pinterest, Google +, or have them emailed directly to your inbox.

  • All-Day Apple Butter

    All-Day Apple Butter

    Here is a deliciously simple crock-pot recipe for homemade apple butter that makes the whole house smell something wonderful! Enjoy it warm over ice cream, or on pancakes, waffles, or a slice of crusty French bread!
    All-Day Apple Butter Time: 15 minutes prep; 12 hours in the crock-pot. Yield: 4 pints
    Ingredients:

    • 5 1/2 pounds tart cooking apples, peeled and finely chopped
    • 2 1/2 cups sugar
    • 3 teaspoons ground cinnamon
    • 1/4 tsp ground cloves
    • 1/4 tsp fine sea salt
    Directions: Place apples in large slow-cooker (6 quart). Combine spices and sugar and pour over apples. Mix well. Cover and cook on HIGH for 1 hr. Reduce heat to LOW and cook, covered, for 9-11 hours until dark and thickened. Stir occasionally to prevent sticking. Uncover and cook on low for 1 hour longer. Stir with a wire whisk until smooth. Spoon into jars or freezer containers, leaving 1 in. head space. Cover and refrigerate or freeze. Makes 4 pints.

    First, pick some apples. Try not to eat them all before you get home.

    Mildly tart varieties like Ginger Golds are an excellent choice.

    Peel and chop 'em up.

    Sprinkle with sugar and spice, and everything nice.

    Cook all day in the crock-pot until thick and brown and delicious.

    Seal, tie with a pretty bow, and give one to a friend.

    If you enjoyed this post, you may wish to follow Growing Home for updates via Google Friend Connect, Facebook, Twitter, Pinterest, Google +, or have them emailed directly to your inbox.
    Linking to: Raising Homemakers, Deep Roots At Home, Raising Arrows, Time Warp Wife, A Wise Woman.,Walking Redeemed, The Better Mom, The Modest Mom, A Mama's Story, The Prairie Homestead, We ARE That Family, Make Ahead Meals, Moms The Word, Allergy Free Wednesdays. Gluten Free Homemakers

  • Curried Coconut Chicken

    Curried Coconut Chicken

    If you love Indian cuisine, this dish will hit the spot while trimming your waistline! It's creamy, curryful (I just made that up), and very pretty too. Our whole family loved it.

    Time: 30 minutes
    Serves: 6
    Gluten-free, nut-free, soy-free, dairy-free and Trim Healthy Mama friendly!
    Ingredients:

    • butter or coconut oil (I use Nuvita or Tropical Traditions) for sauteing. You could also use coconut butter ghee.
    • 1 onion, chopped
    • 1 1/2 Tbsp curry powder (or to taste)
    • 1 small cauliflower, in florets
    • 3 carrots, sliced diagonally (use broccoli for a THM S meal)
    • 4 cloves garlic, minced
    • 1-2 cups cooked chicken, sliced in 2" pieces
    • 1 can full-fat coconut milk
    • Handful of spinach, chopped
    • Sea salt and cayenne pepper to taste

    Directions:
    Saute onion, curry, cauliflower, and carrots in butter or coconut oil. When vegetables are tender-crisp, and garlic and chicken and saute briefly. Add coconut milk and spinach. Cover and bring to a simmer. Season with sea salt and cayenne pepper to taste.

    You can make this in the morning and keep it warm in the crock pot all day.

    For Trim Healthy Mamas, you can serve eat this on its own or serve over a bed of greens for a delicious, Satisfying meal. For a Crossover, serve with rice or quinoa, or enjoy inside a low-carb wrap such as Joseph's.

    In the interest of full disclosure, some of the links in this post are “affiliate links.” This means if you click on the link and purchase the item, I receive an affiliate commission. I only recommend products I use personally. Your purchases through these links help support Growing Home. Thank you for your continued support!
    Linking to: Raising Homemakers, Deep Roots At Home, The Better Mom, Frugally Sustainable, The Prairie Homestead, Stacy Makes Cents, Gluten-Free Wednesdays

  • Monkey Bread

    Monkey Bread

    This recipe is easy-peasy! And has zero nutritional value. But, oh is it ever good! Monkey Bread is a great hit with young people as well as a perfect recipe for little chefs. It's a fast, no-fail winner that everyone and their uncles will love.

    You'll need: 1 (3.5 ounces) package of cook and serve butterscotch pudding mix 1 Tbsp. Cinnamon 3/4 cup Sugar 1/2 cup Butter, melted 3 (10 ounce) cans of refridgerated biscuts (I used Pilsbury) icing sugar & milk for glaze optional: nuts of your choice Combine pudding mix, sugar, cinnamon and nuts (if you're using them) together in a bowl with a tight fitting lid. Pour melted butter into a seperate dish. Cut biscuts into quarters with kitchen shears. Dip each piece in butter and than place in cinnamon mixture. Seal lid and shake until each piece is evenly coated. Remove to a greased, 10-inch bundt or fluted pan. Bake at 350 for 30-35 minutes. Cool for 30 minutes before inverting onto a serving plate.
    Dig in!

  • I should

    I should

    I woke up and ran through my list of "should-do's" in my head.

    I should do laundry before the kids run out of clean underwear.

    I should do some weekend housework so our house looks half-decently presentable for evening visitors.

    I should make red pepper butter before the peppers in the garden go bad.

    I should vacuum the Cheerios and dirt off the floor in the van and I should probably wash the outside while I'm at it.

    I should start supper and get it in the crock-pot before the afternoon gets so filled up that I excuse myself and order take-out again.

    I should go buy stamps for the mail that should be sent out.

    I should respond to my overflowing inbox.

    I should, I should, I should.

    My thoughts were interrupted by an excited little voice from a girl in a yellow princess dress. "Mommy, I have a good idea! We should go to the park!"

    I smiled and almost spit out my standard line, "No, not right now. Mommy has a lot of things need to get done first," but I didn't. Her suggestion startled me. It wasn't a request out of the ordinary, but it revealed something concerning; in my long list of things that needed attention, deliberately taking the time to enjoy my children without distraction was not one of them.

    They were the interruptions to my housework, the distractions to making red pepper butter, and a interference while I folded wash. My list for the day suggested they were an after thought, not a priority.

    A lump caught in my throat. I never want my children to feel like an annoyance, or worse, a mistake.

    They needed to know that they were more precious to me than clean floors, a stack of neatly folded towels, and red pepper butter.

    Read the rest at Raising Homemakers.

    ***

    If you're looking for a great resource to help you find the balance between mothering and managing your home, may I recommend Large Family Logistics? The title is a bit misleading in that this book is helpful for any mother, not just those with several children! This is my go-to gift for Moms, new and seasoned, and my #1 favorite resource as a Keeper of the Home. Kim Brenneman will equip you with everything you need to efficiently run a household while making your children your top priority.

    This post contains affiliate links. Thank-you for your support!

    If you enjoyed this post, you may wish to follow Growing Home for updates via Google Friend Connect, Facebook, Twitter, Pinterest, Google +, or have them emailed directly to your inbox.

  • Boerenkool met Worst

    Boerenkool met Worst

    If you're Dutch, you probably started salivating when you read the title. If you're not... well, allow me to let you in on the best kept secret!

    Boerenkool met Worst is one of my very favorite meals. It kind of runs in the family; my Dad wanted this dish to be served at their wedding! I've made it twice in the past three weeks. It's a Dutch winter comfort food and I've been craving it since the temperature outside dropped below freezing. It's also extremely healthy (minus the sausage), and very frugal.

    Most people have their own version of how to make this dish, but it's more or less the same. I make mine the way my mom does (except I didn't have a garden this year, so I have to buy my kale instead. It's still delicious!). We've never written out the recipe for it until now. It's one of those dishes that gets passed on from generation to generation by word of mouth. But if you're not Dutch and happened to miss out, here's a good place to get started!

    You'll need:

    -2-3 lbs of potatoes (I use yellow flesh)
    -3 cups of finely chopped kale (I use HAK canned kale, strained)
    -2 Tablespoons butter
    -milk
    -salt
    -pepper

    -Rookworst (Smoked Sausage)
    -water for simmering

    Peel potatoes. Cut them in half and place them with the boerenkool (if you're using frozen kale; otherwise, add the canned kale after the potatoes have been cooked and drained) in a large pot. Cover with water and add a little salt. Bring to a boil and cook everything for about 25-30 minutes.
    Meanwhile, allow sausage to simmer in a smaller saucepan.
    Add the milk (1/2 cup) and a spoon of butter, mash boerenkool and potatoes until all vegetables are mixed. Add more butter, milk, salt, pepper, and vinegar as needed.
    Serve with the rookworst.

    Tips: if you don't grow your own kale, this is a great brand to use:

    You can buy it at Dutch specialty shops for $3-$4 a jar. We can get 2-3 meals out of it.

    Country Meat Packaging Sausage is by far the best sausage to compliment the boerenkool-it's just not the same without it! You can find more information about it and where to purchase it {here}.

    My Opa and Oma always preferred this dish with gravy. I like adding some of the "sausage water" during the mashing process instead.

    Enjoy!

  • Recipes

    Recipes
  • How A Single Income Family Can Afford A Whole-Food Diet

    How A Single Income Family Can Afford A Whole-Food Diet
  • Squares/Snacks

    Squares/Snacks
  • Chunky Cream Pops {Gluten-Free}

    Chunky Cream Pops {Gluten-Free}
  • Spinach Quiche

    Spinach Quiche
  • Tomato Spice Soup

    Tomato Spice Soup
  • Cream Puffs

    Cream Puffs
  • Appetizers

    Appetizers
  • Honey Cinnamon Granola

    Honey Cinnamon Granola
  • Raspberry Oatmeal Bars

    Raspberry Oatmeal Bars

Random for success: